
Start here
What is MACS?
MACS stands for Mobile Absence Clearance System — the parent-facing side of SchoolRiver's APX platform. The system has been designed to work natively with Aeries SIS. Instead of paper notes, phone calls, and trips to the attendance office, parents and guardians clear absences and request early leave from a phone or computer, and the school's attendance staff review and approve those requests digitally.
No more paper notes
Handwritten notes get lost or misplaced; digital submissions are stored securely and can always be retrieved.
Faster for everyone
Clearing an absence drops from 5–7 minutes of manual processing to under a minute.
Consistent records
Every absence is cleared the same way, with the reason and periods captured for each request.
How it fits together
- Each day the system checks the school's attendance records and texts or emails parents about absences that still need clearing.
- Parents open the link, pick the periods and reason, and submit a note — or request an early leave for their student.
- The attendance office reviews the request; once approved, the clearance and note are logged into the school's attendance system automatically.
No account needed
Overview
The process, end to end
Every request follows the same path: authenticate, receive a secure link by phone or email, then submit either an absence clearance or an early leave request.
Step 1 of 8
Log in
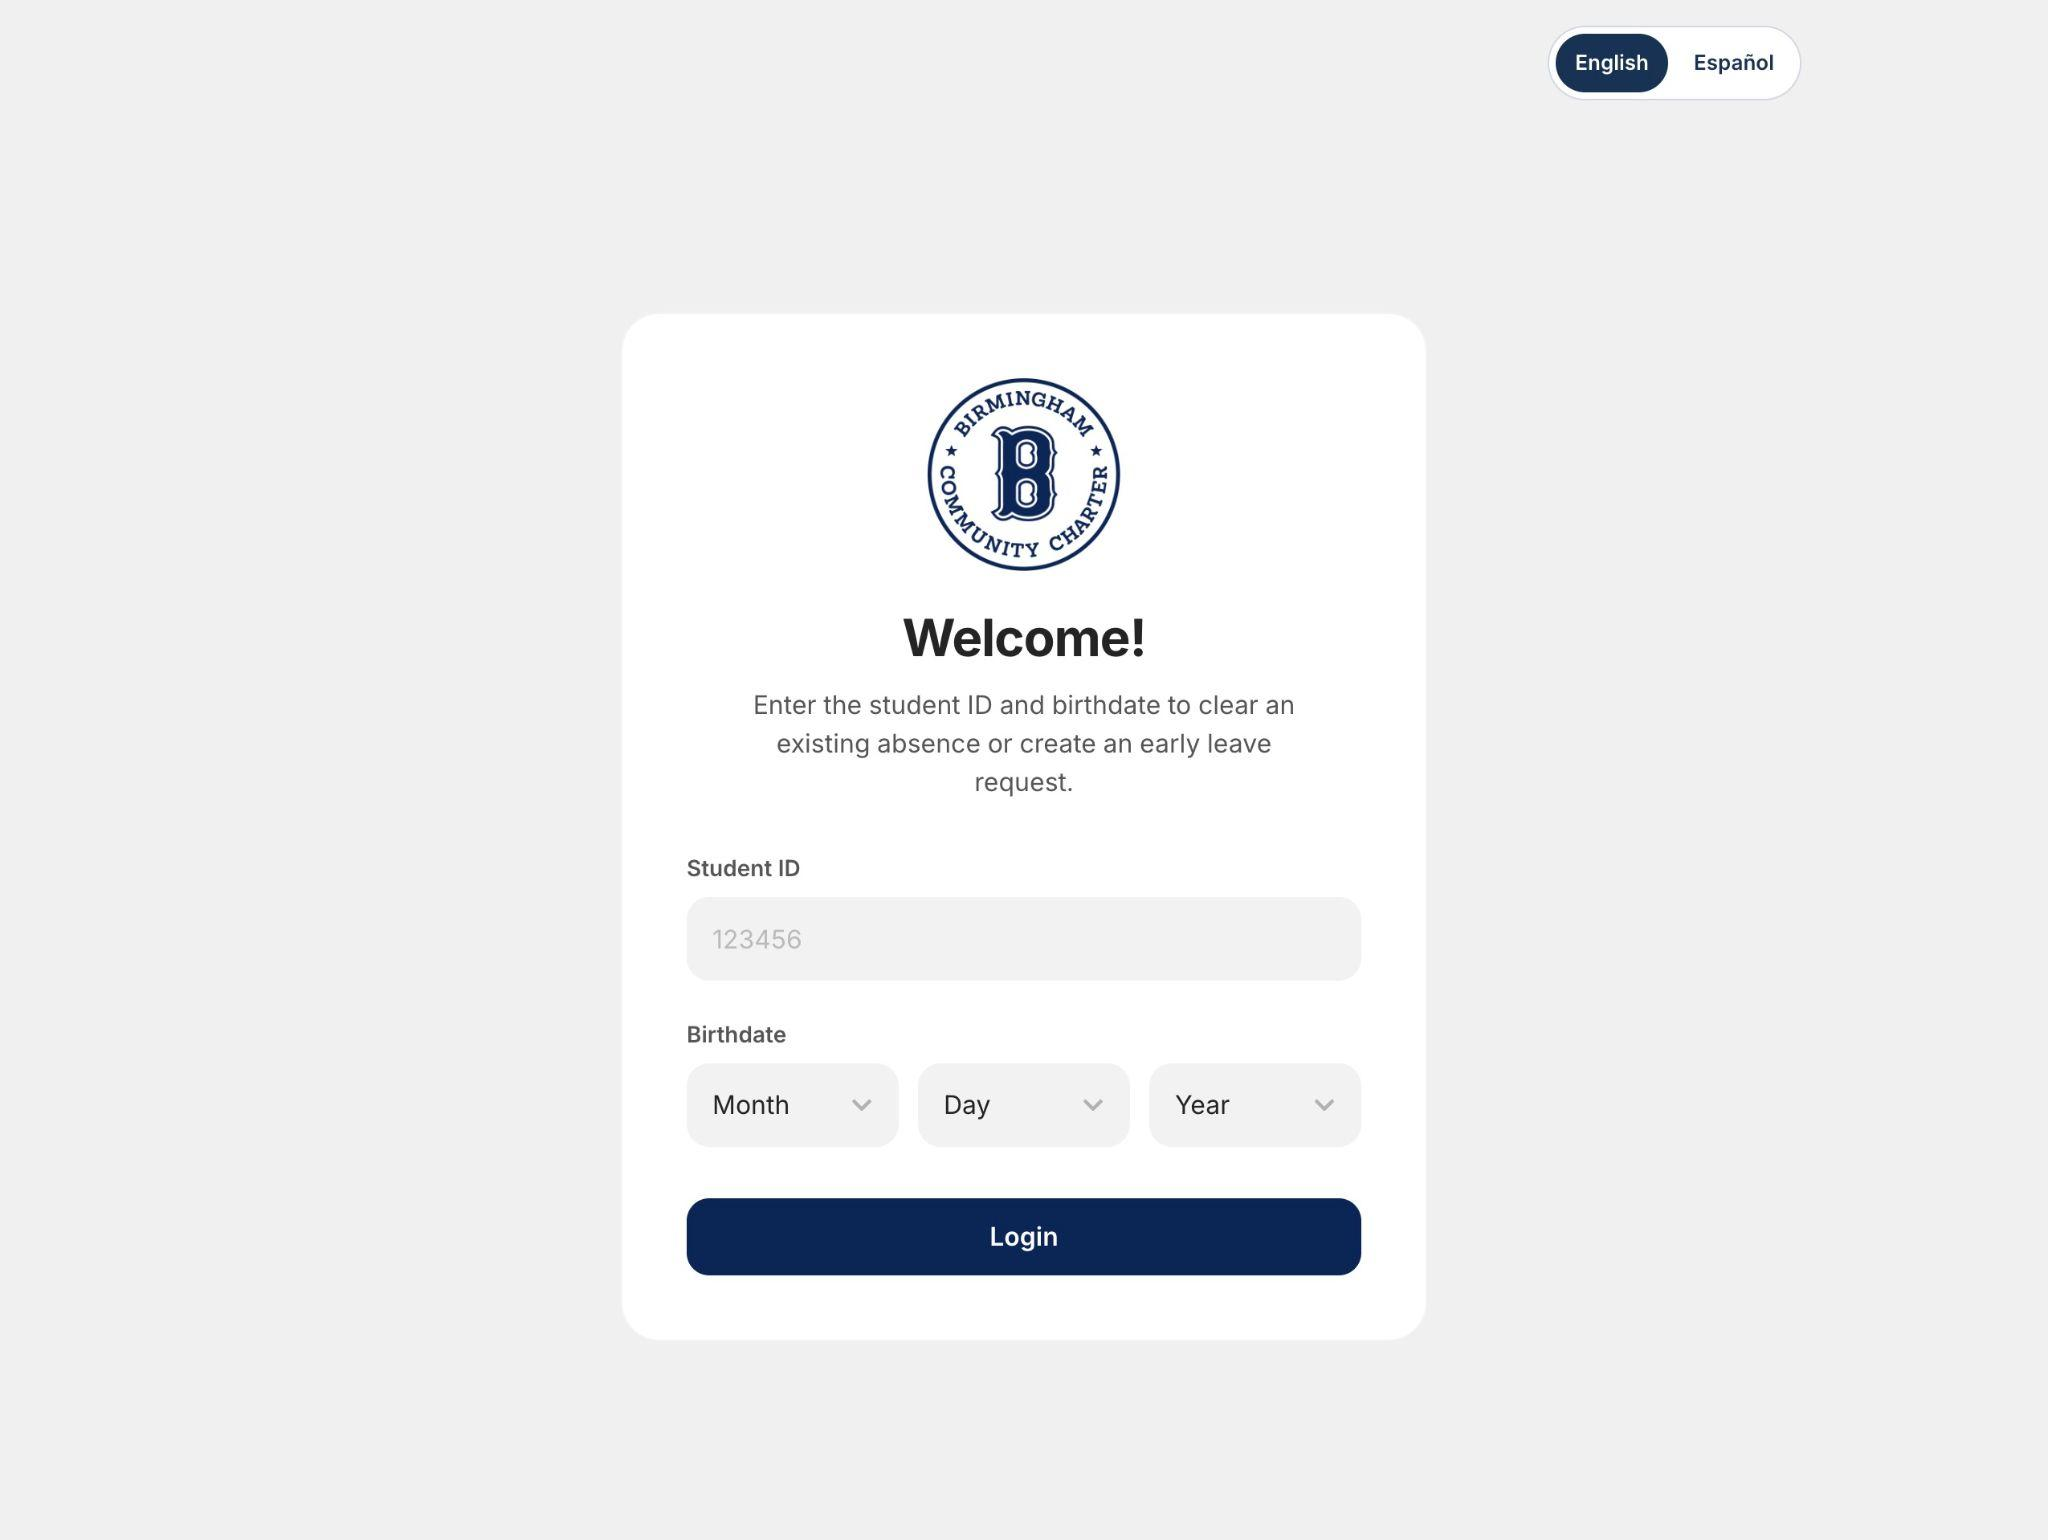
Open MACS in a supported browser, choose English or Spanish, enter the Student ID, and select the birth month, day, and year. A missing or invalid value displays an error until it is corrected.
Login status
Verifying Student ID
Secure link
Not sent yet
Request
Not started
Step one
Access to the MACS system
To log in to the MACS system, you must first enter your Student ID and birthdate. After you authenticate successfully, select a contact method to receive a secure link. This link will allow you to safely access the system and complete the logging in process.
Steps
- Open the system in a supported web browser.
- Choose English or Spanish.
- Enter the Student ID.
- Select the birth month, day, and year.
- Select Login.
Contact information
Step two
Contact details
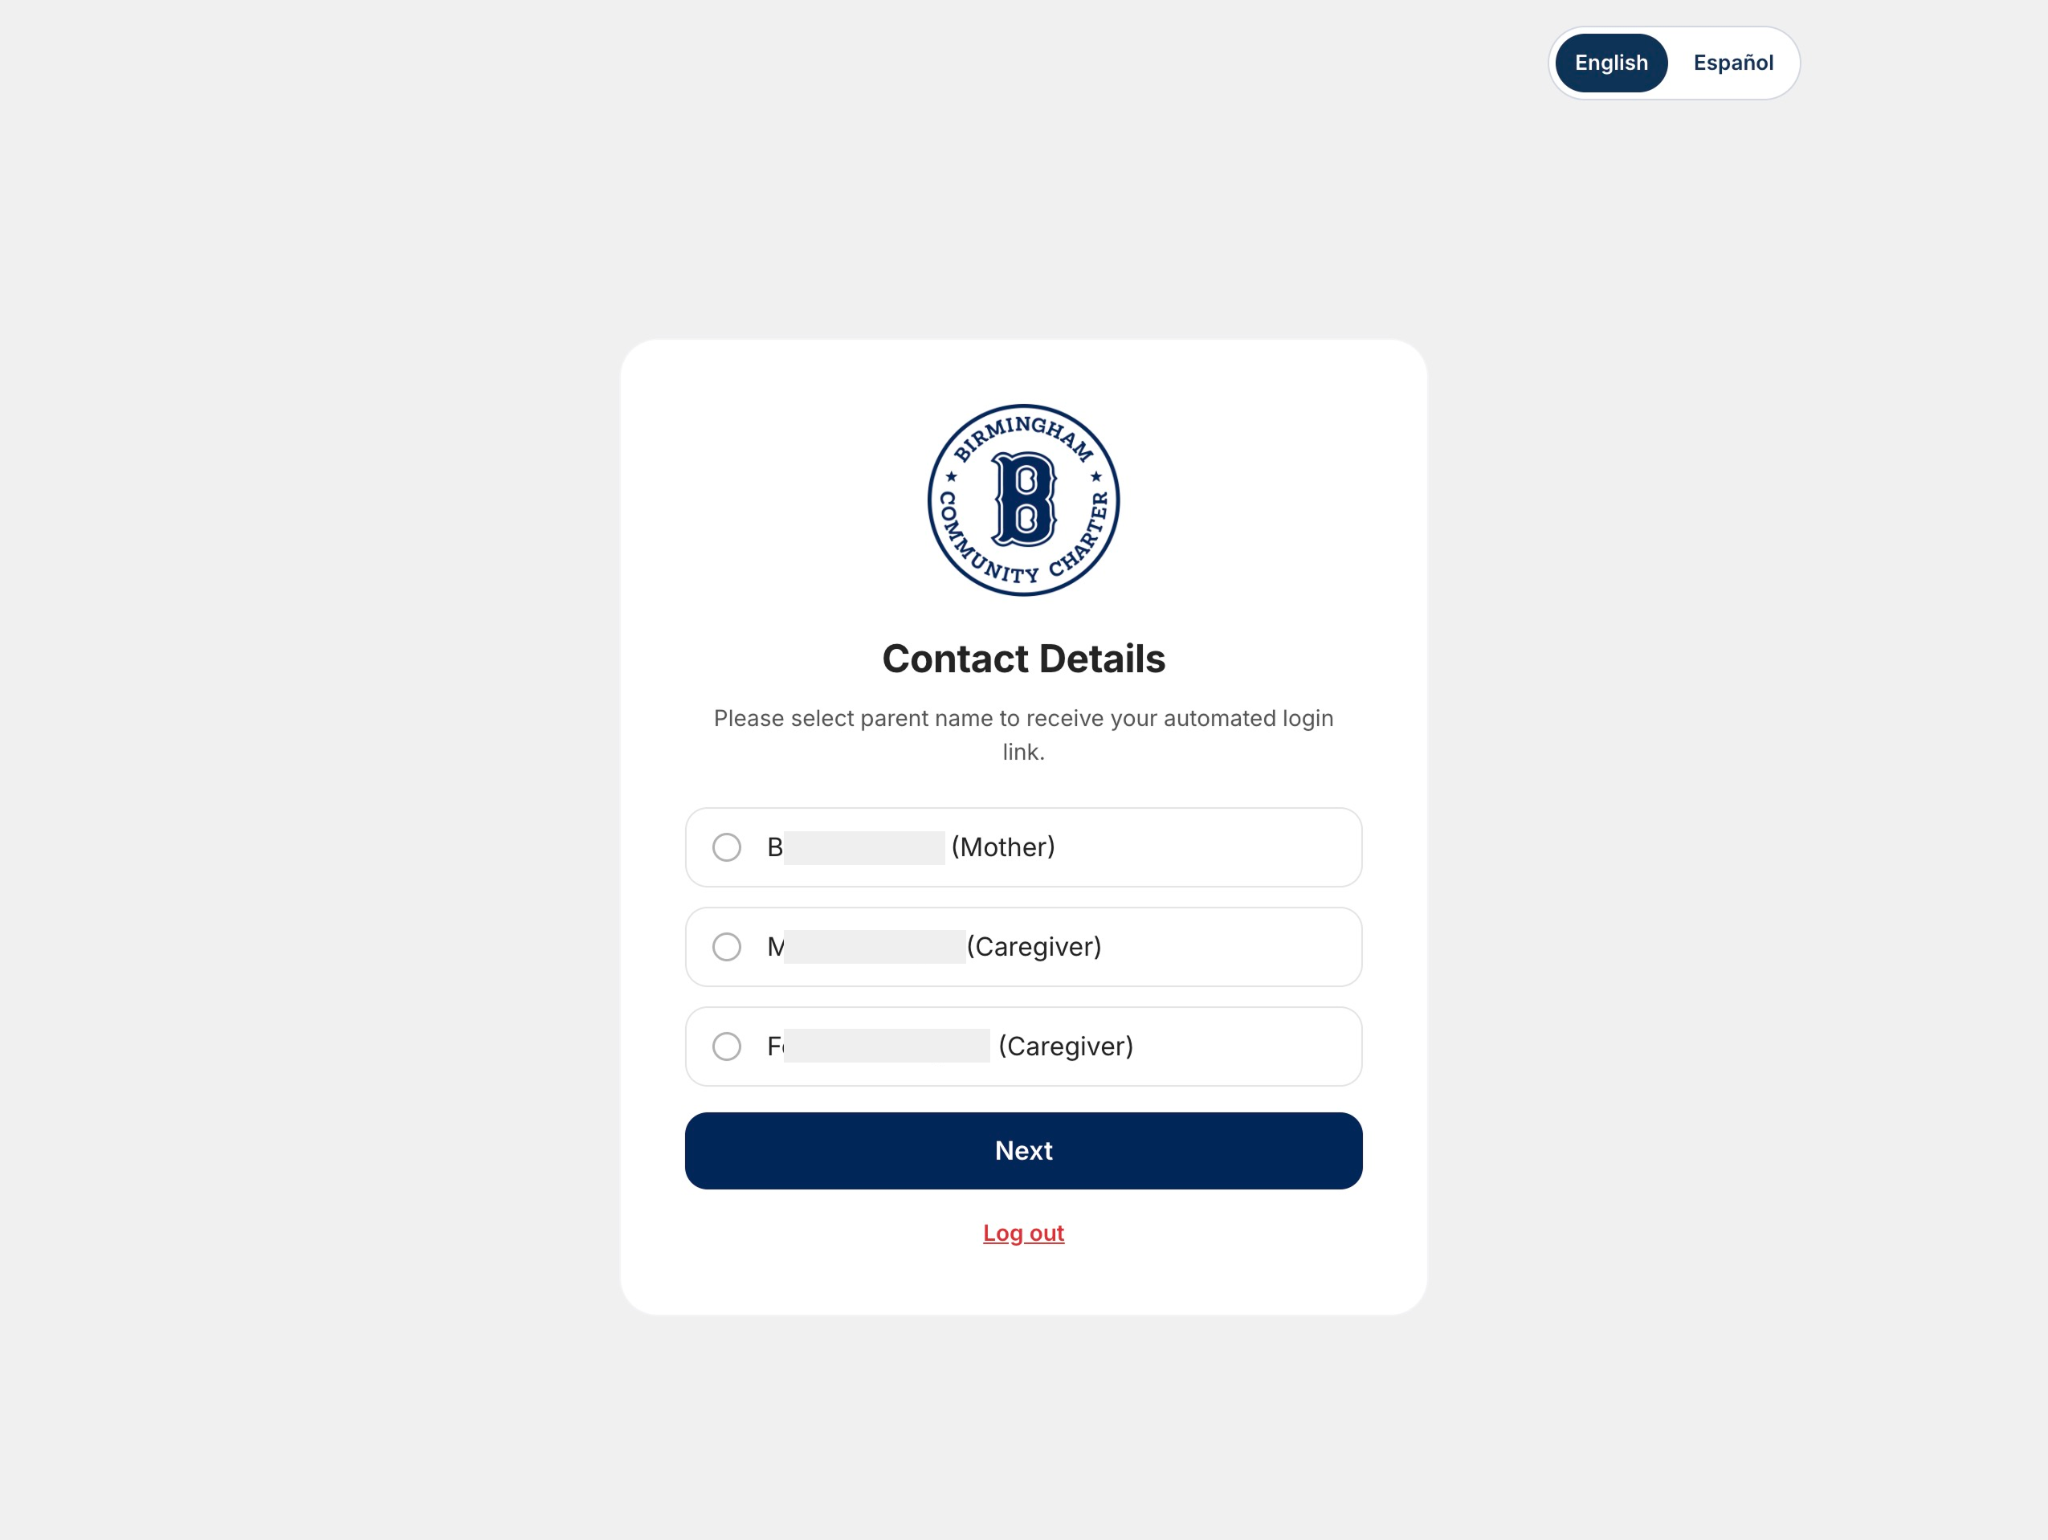
The user must then select a contact and receive the secure link.
Steps
- Review the list of parent, guardian, or other available contacts.
- Select the contact name.
- Select Next.
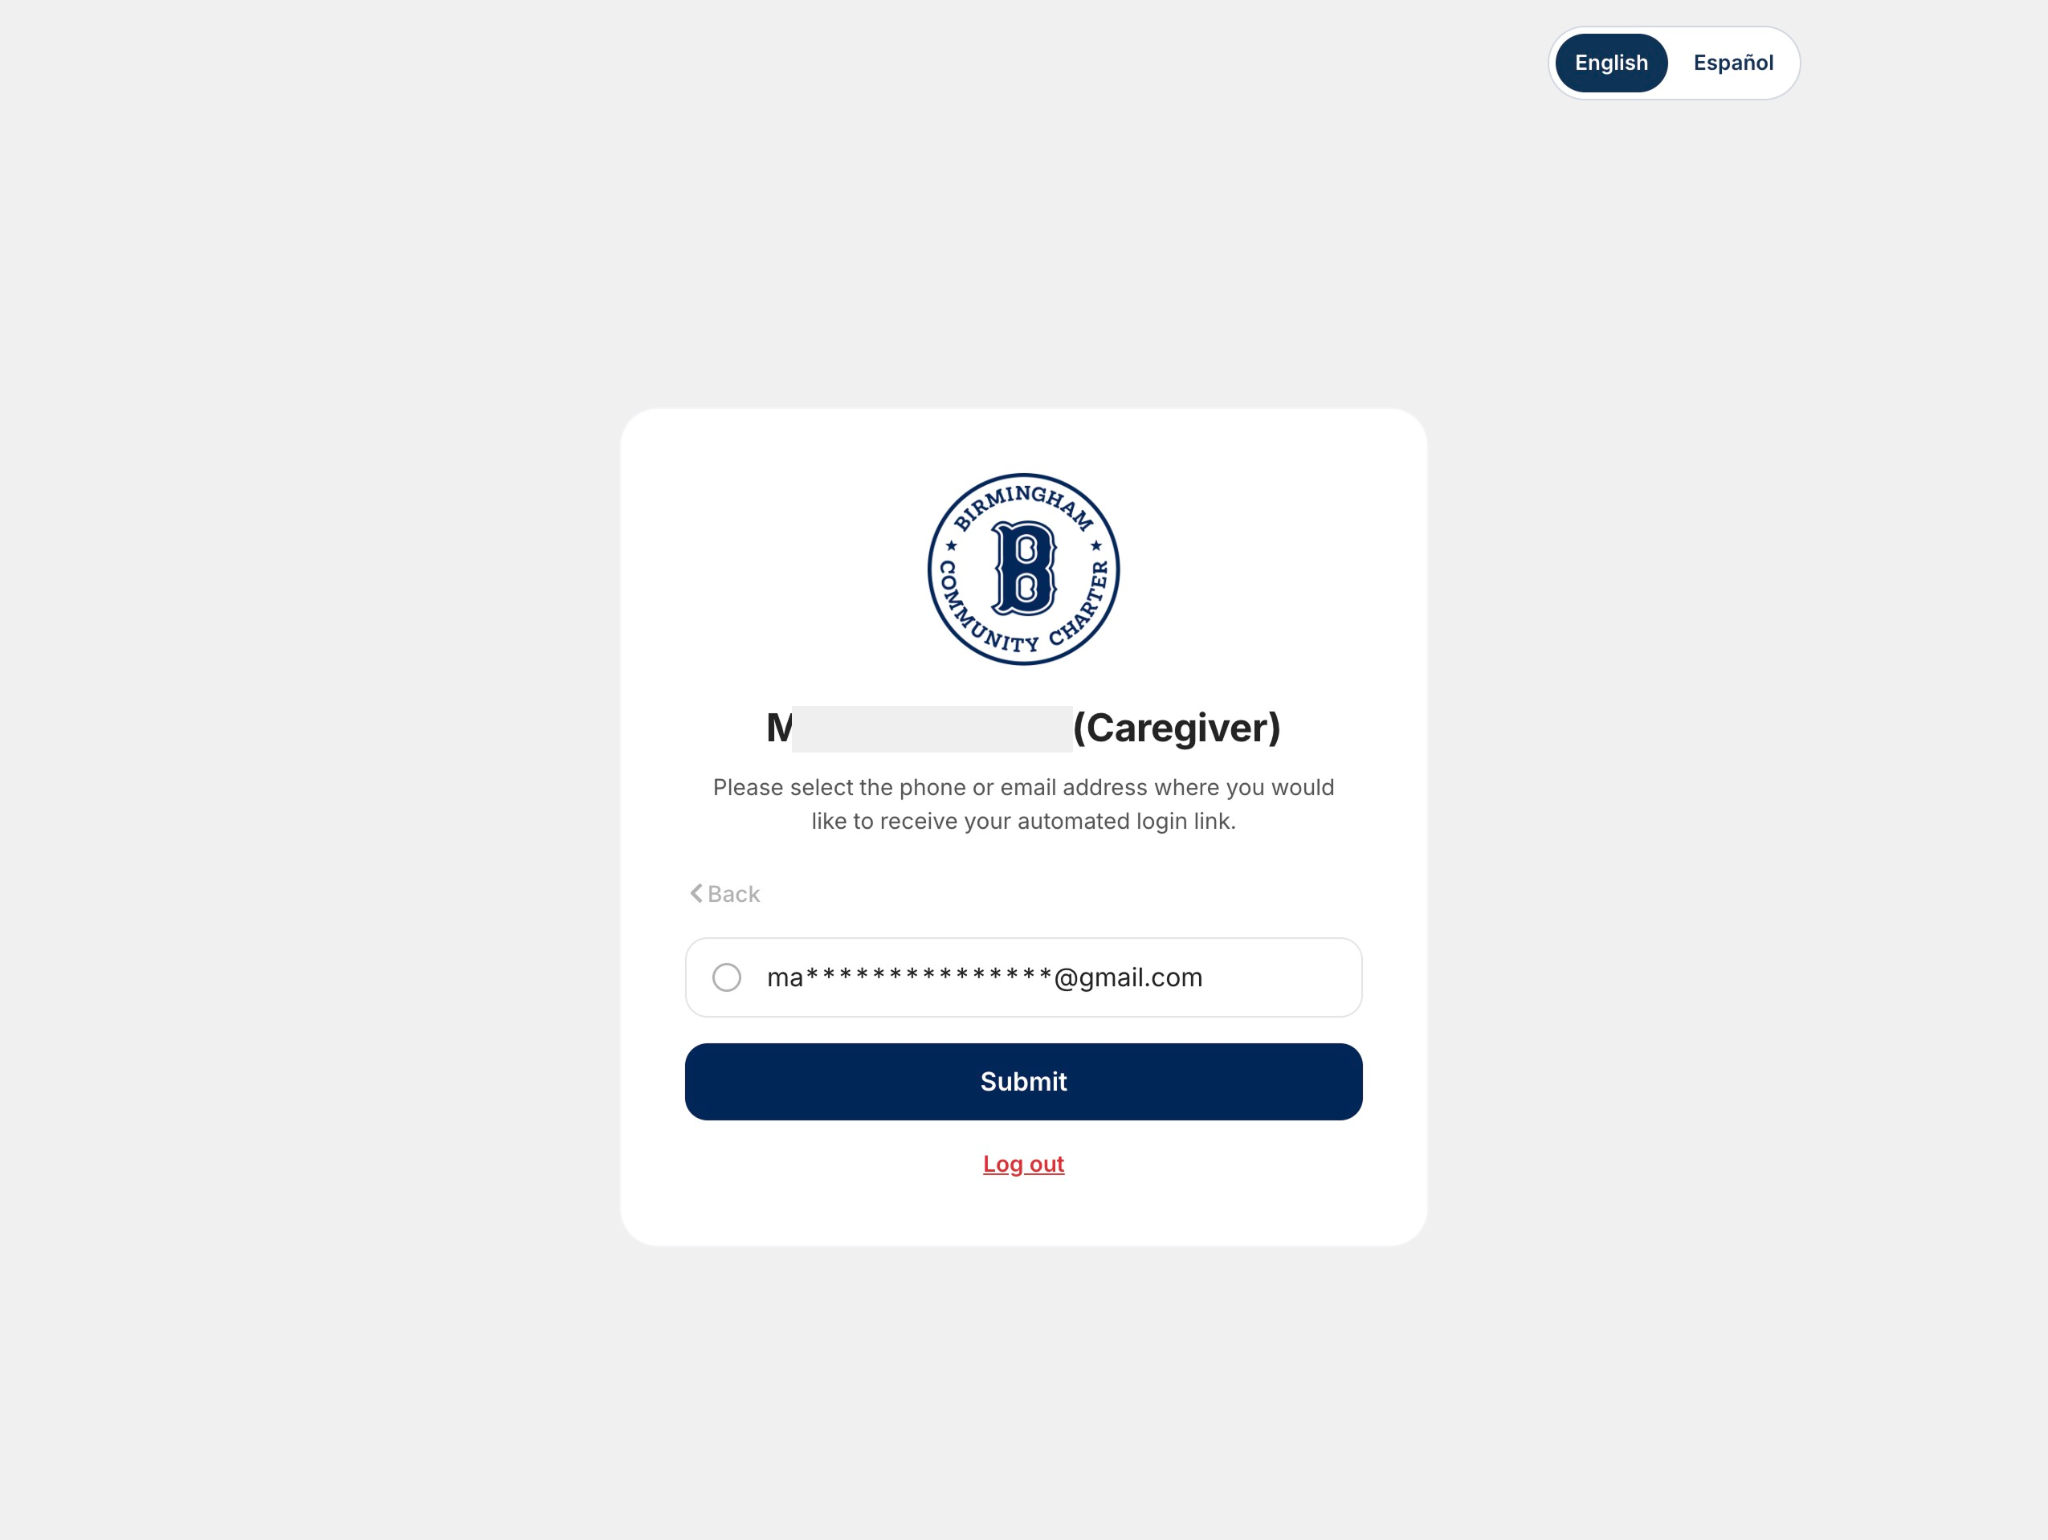
- Review the masked phone number and email address options. The system hides part of each value for privacy.
- Select the phone number or email address where the automated link should be sent.
- Select Submit.
Step three
Send automated login link
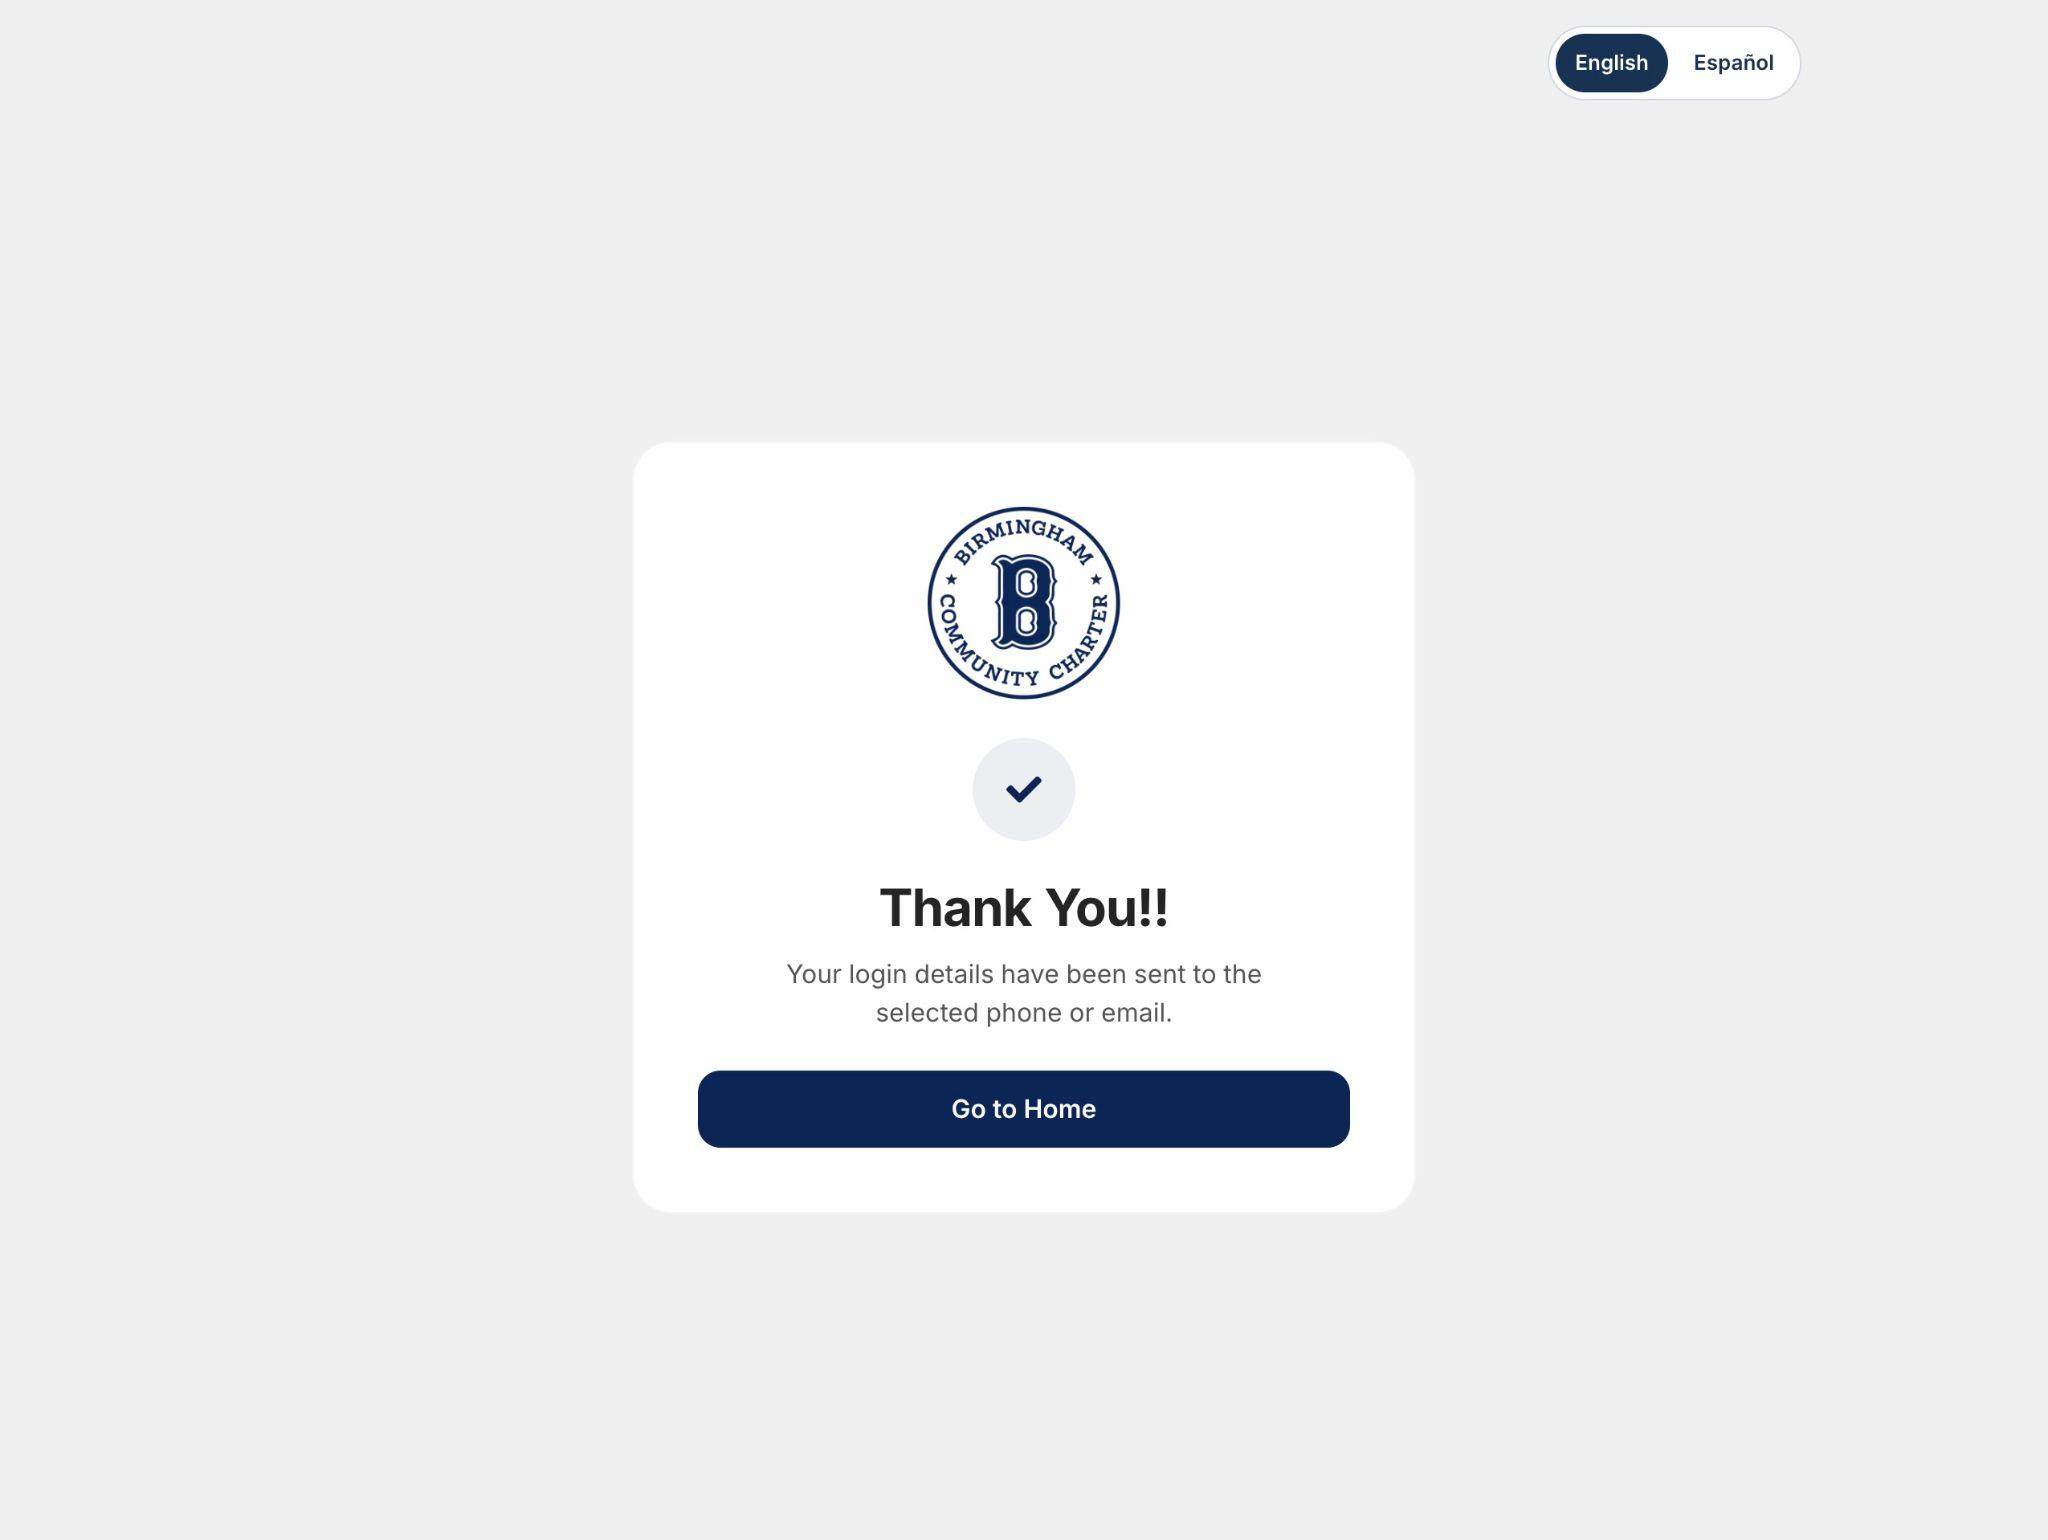
Once you have reviewed the list of available contacts, select the contact method you would like to use to receive the secure link. Verify that the selected email address or phone number is correct, then click Submit. Check your email or text messages for the link and open it to securely complete the logging in process.
Step four
Open your email and search for the message from MACS
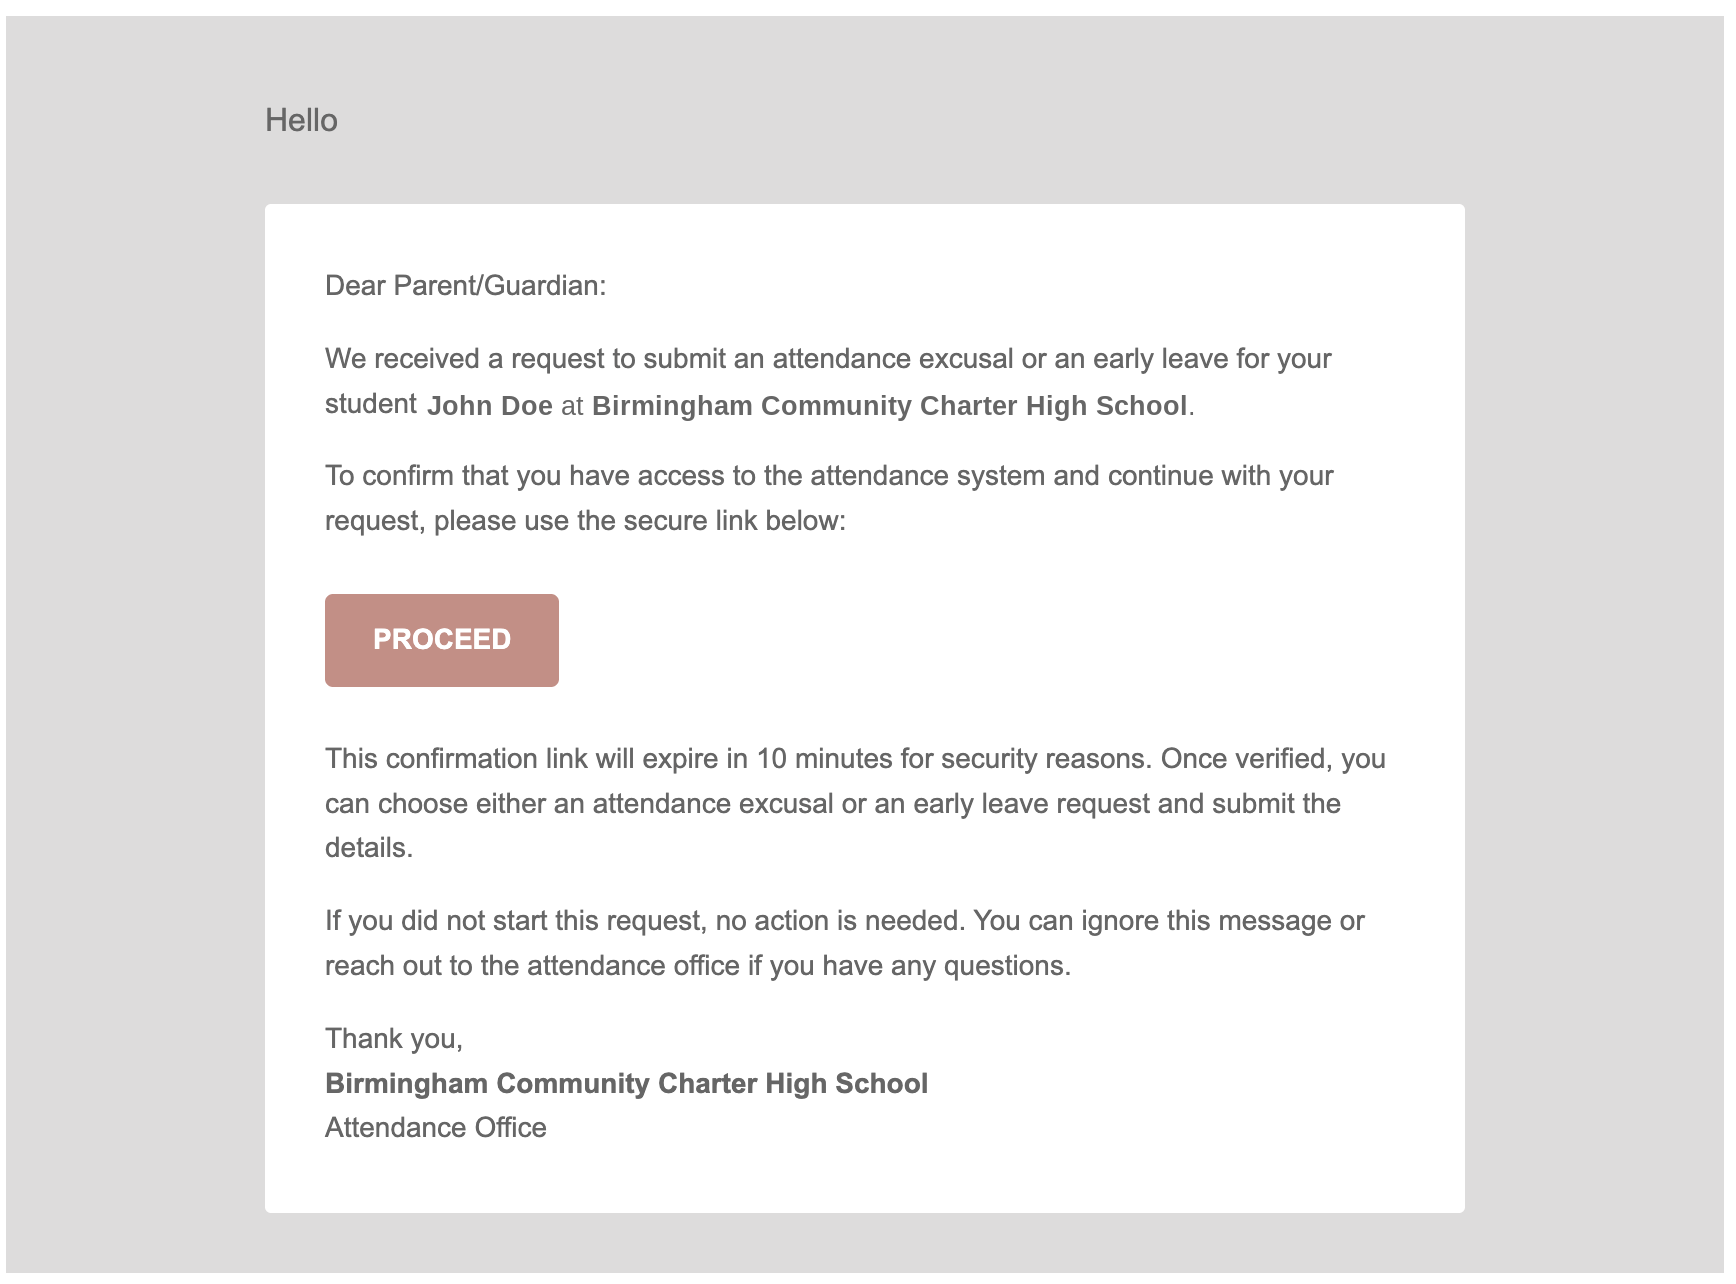
After you select the delivery method, MACS sends a secure login link to the chosen email address. Open the inbox for that address and locate the message from the MACS system. If the message is not visible, check the spam or junk folder. Open the message and select the secure login link to continue. Use the link as soon as possible because it may expire.
No contacts available
Step five
Student profile and navigation
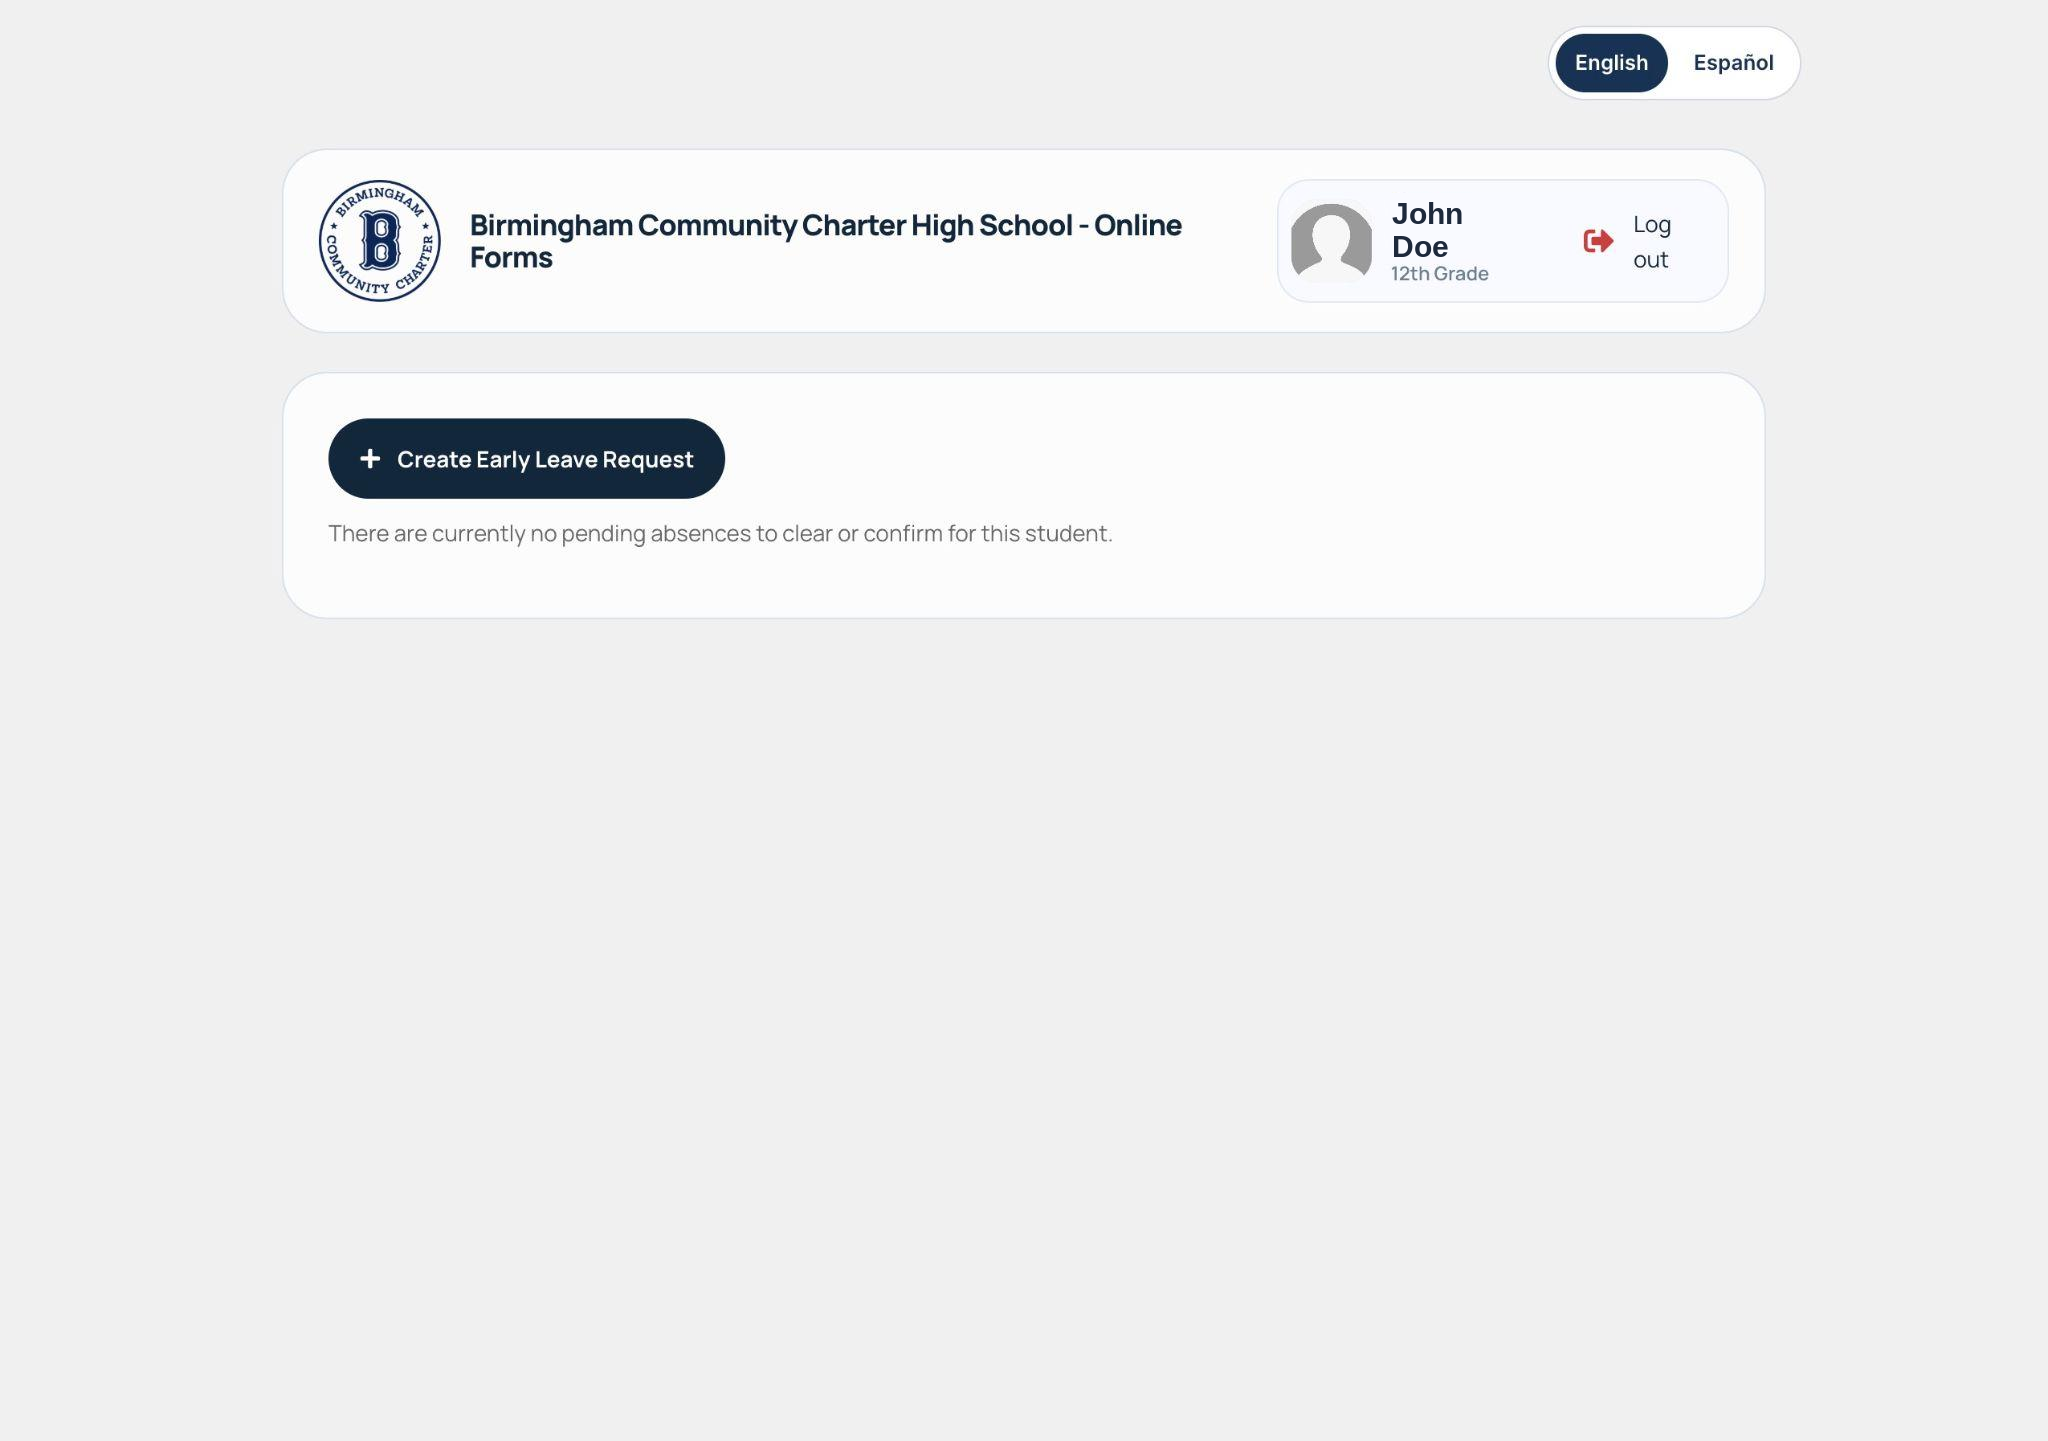
After logging in, the student profile displays the student name, grade, and profile image when available. If no student image is available, the system displays the school avatar or default image.
Available actions
- Select Clear Absence Form to review absences and submit reasons.
- Select Early Leave Form to request an early departure for a future date or later the same day.
- Use the Back on form pages to return to the previous area when available.
- Select Log out to end the session.
Path A
Absence clearance
Absence clearance lets the user review absences and submit a reason for one or more periods on a date. The system groups periods by absence date so the user can review each date as a single record.
Review pending teacher confirmations
Steps
- Open Absence Clearance from the student profile or secure link page.
- Review the Pending Teacher Absence Confirmation section, if it appears.
- Review the dates and periods shown in the pending clearance section.
- Open an absence record to view its date and periods.
- Choose one reason for the selected absence record.
- Use Clear Selection if the reason needs to be removed before submission.
- Repeat the selection for any additional absence records that should be submitted together.
- Select Submit. At least one absence record must have a reason.
- Review the confirmation message. The attendance team is notified that the request is being processed.
- Select Submit Another Request to continue, or use Log out to end the session.
Schedule and submission
Path B
Early Leave
Early leave requests are handled by ELS — SchoolRiver's Early Leave System, the extension that replaces the manual early dismissal process. Instead of unannounced parent arrivals, paper sign-out slips, and classroom interruptions, parents submit and verify an early pickup online, staff approve it with a few clicks, and the release is written directly into Aeries SIS with an accurate time stamp.
No manual data entry
Once the student has been picked up, attendance clerks approve multiple early leave requests at once and transfer them electronically into Aeries.
Accurate release times
No lost slips and no wrong students — a release time stamp ensures the actual time is recorded correctly in Aeries.
Full audit trail
Every transaction captures the parent's identity, timestamps, staff initials, and digital signature as a permanent record.
How it fits together
- The parent logs in with the student's ID and date of birth, then receives a secure one-time link at a masked phone number or email already on file.
- Through that link the parent submits the request — reason, date, release time, and any supporting documentation such as a doctor's note.
- On the day of the leave the student checks in at the Early Leave Kiosk and receives a printed permission slip to show the teacher.
- When the parent arrives, the attendance clerk reviews and approves the dismissal, and the early leave is recorded in Aeries automatically.
Faster for everyone
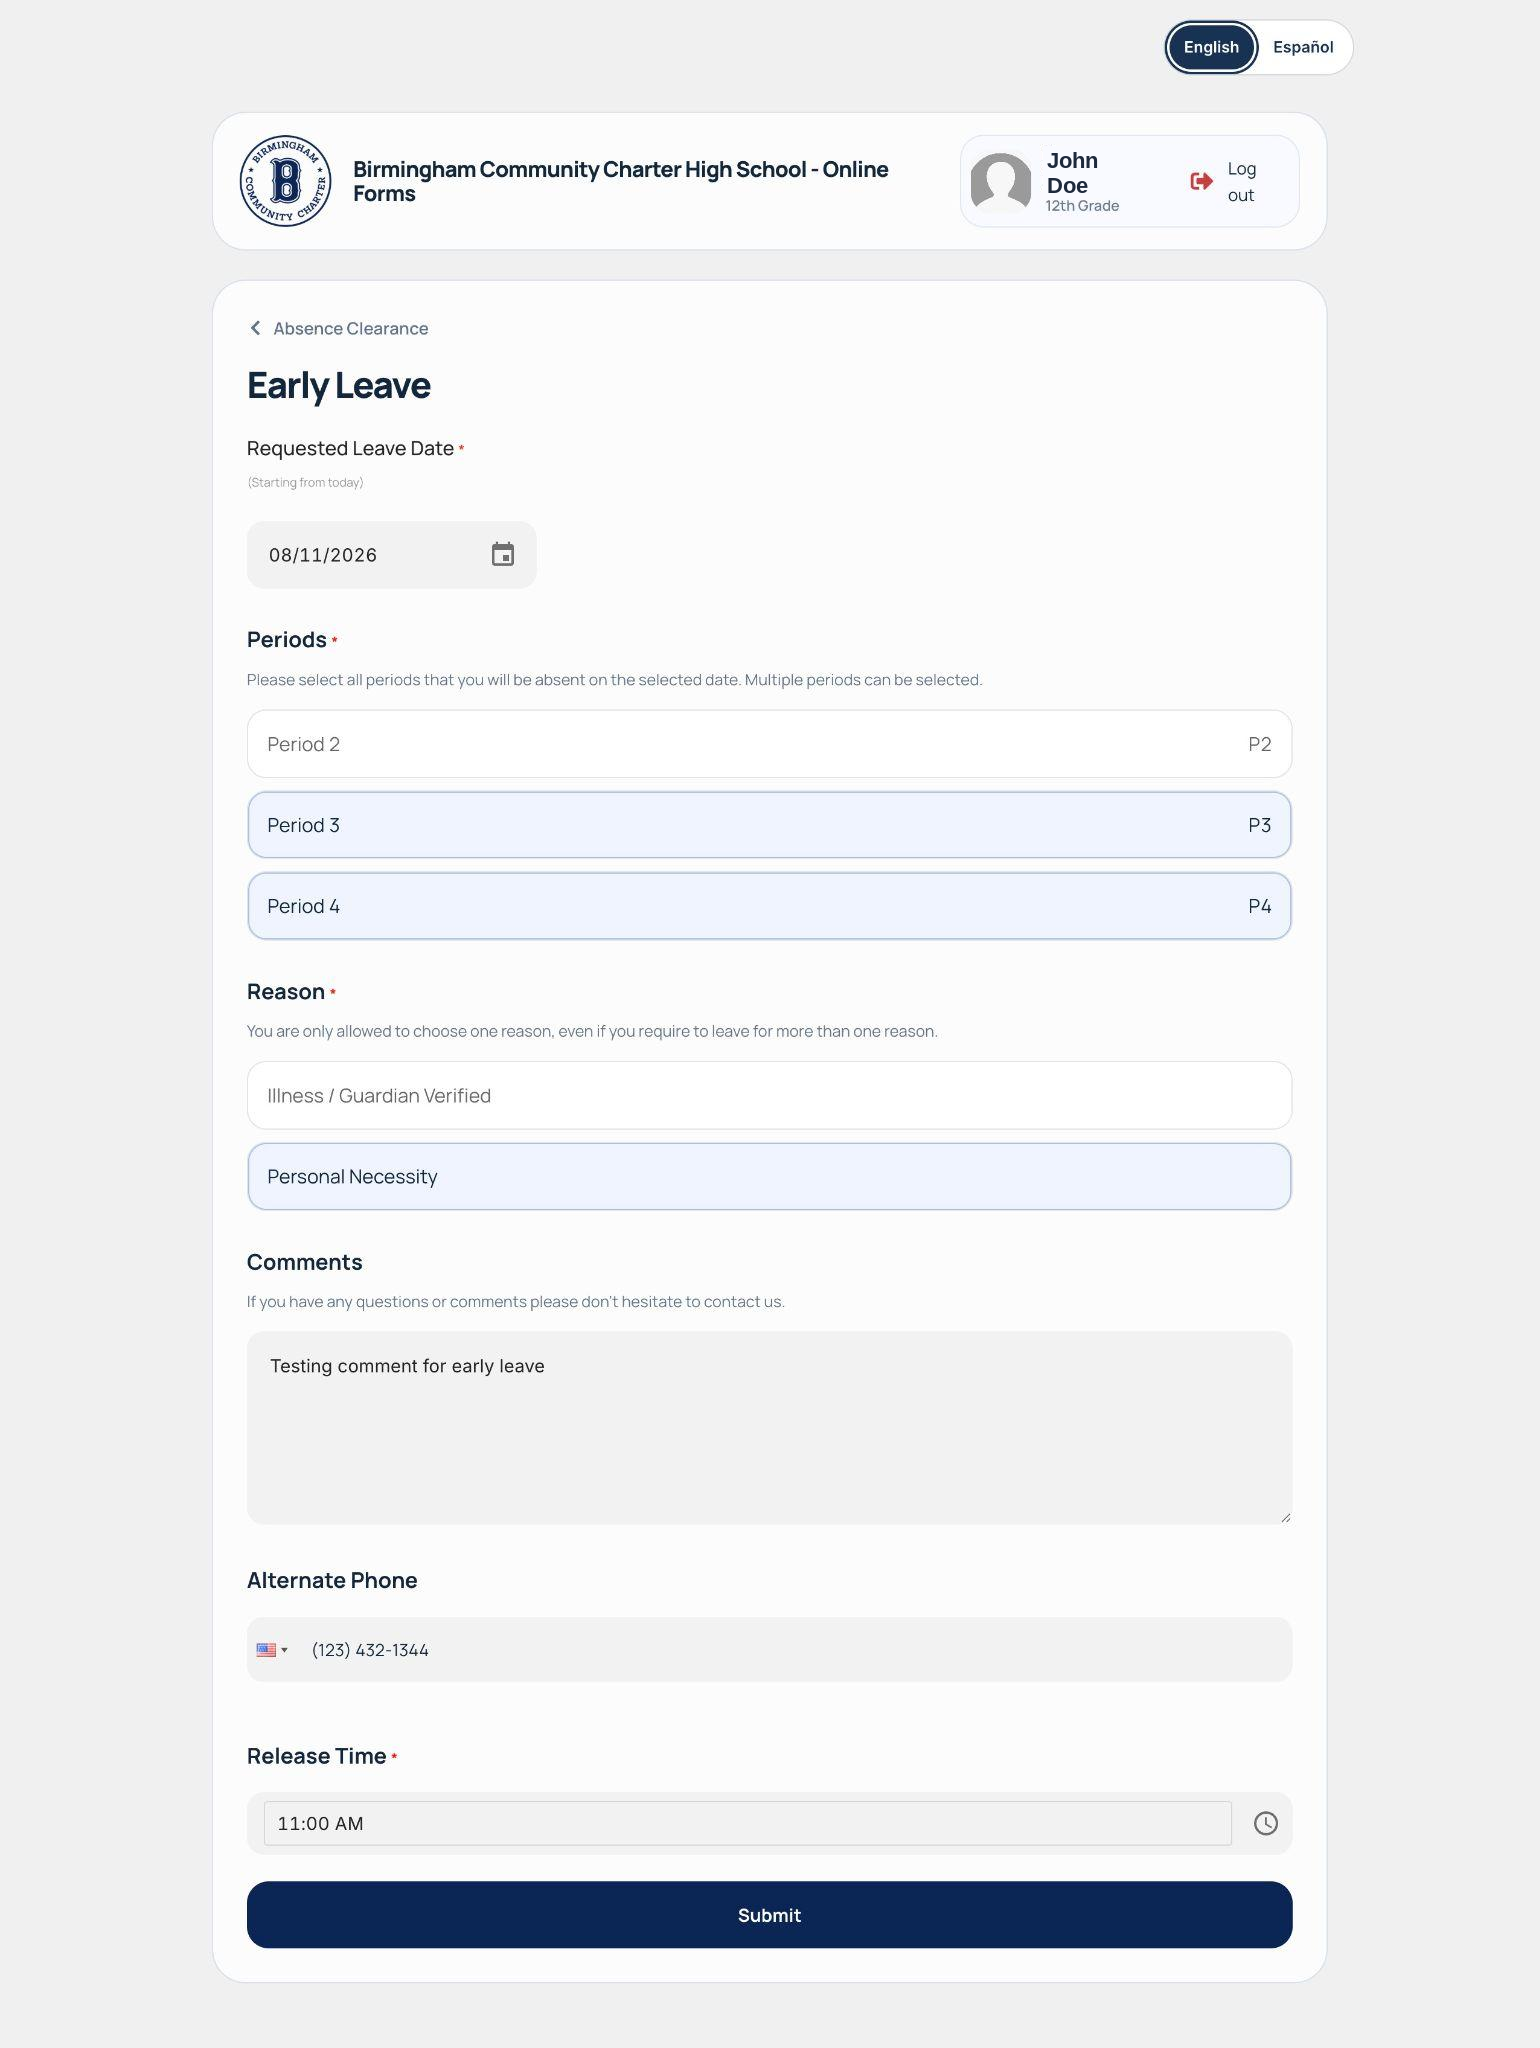
The Early Leave form creates a request for a student to leave early on a selected date. The available periods are loaded from the student schedule for that date.
Interactive flow
From submission to Aeries — step through the process
Step 1 of 5
Request submitted
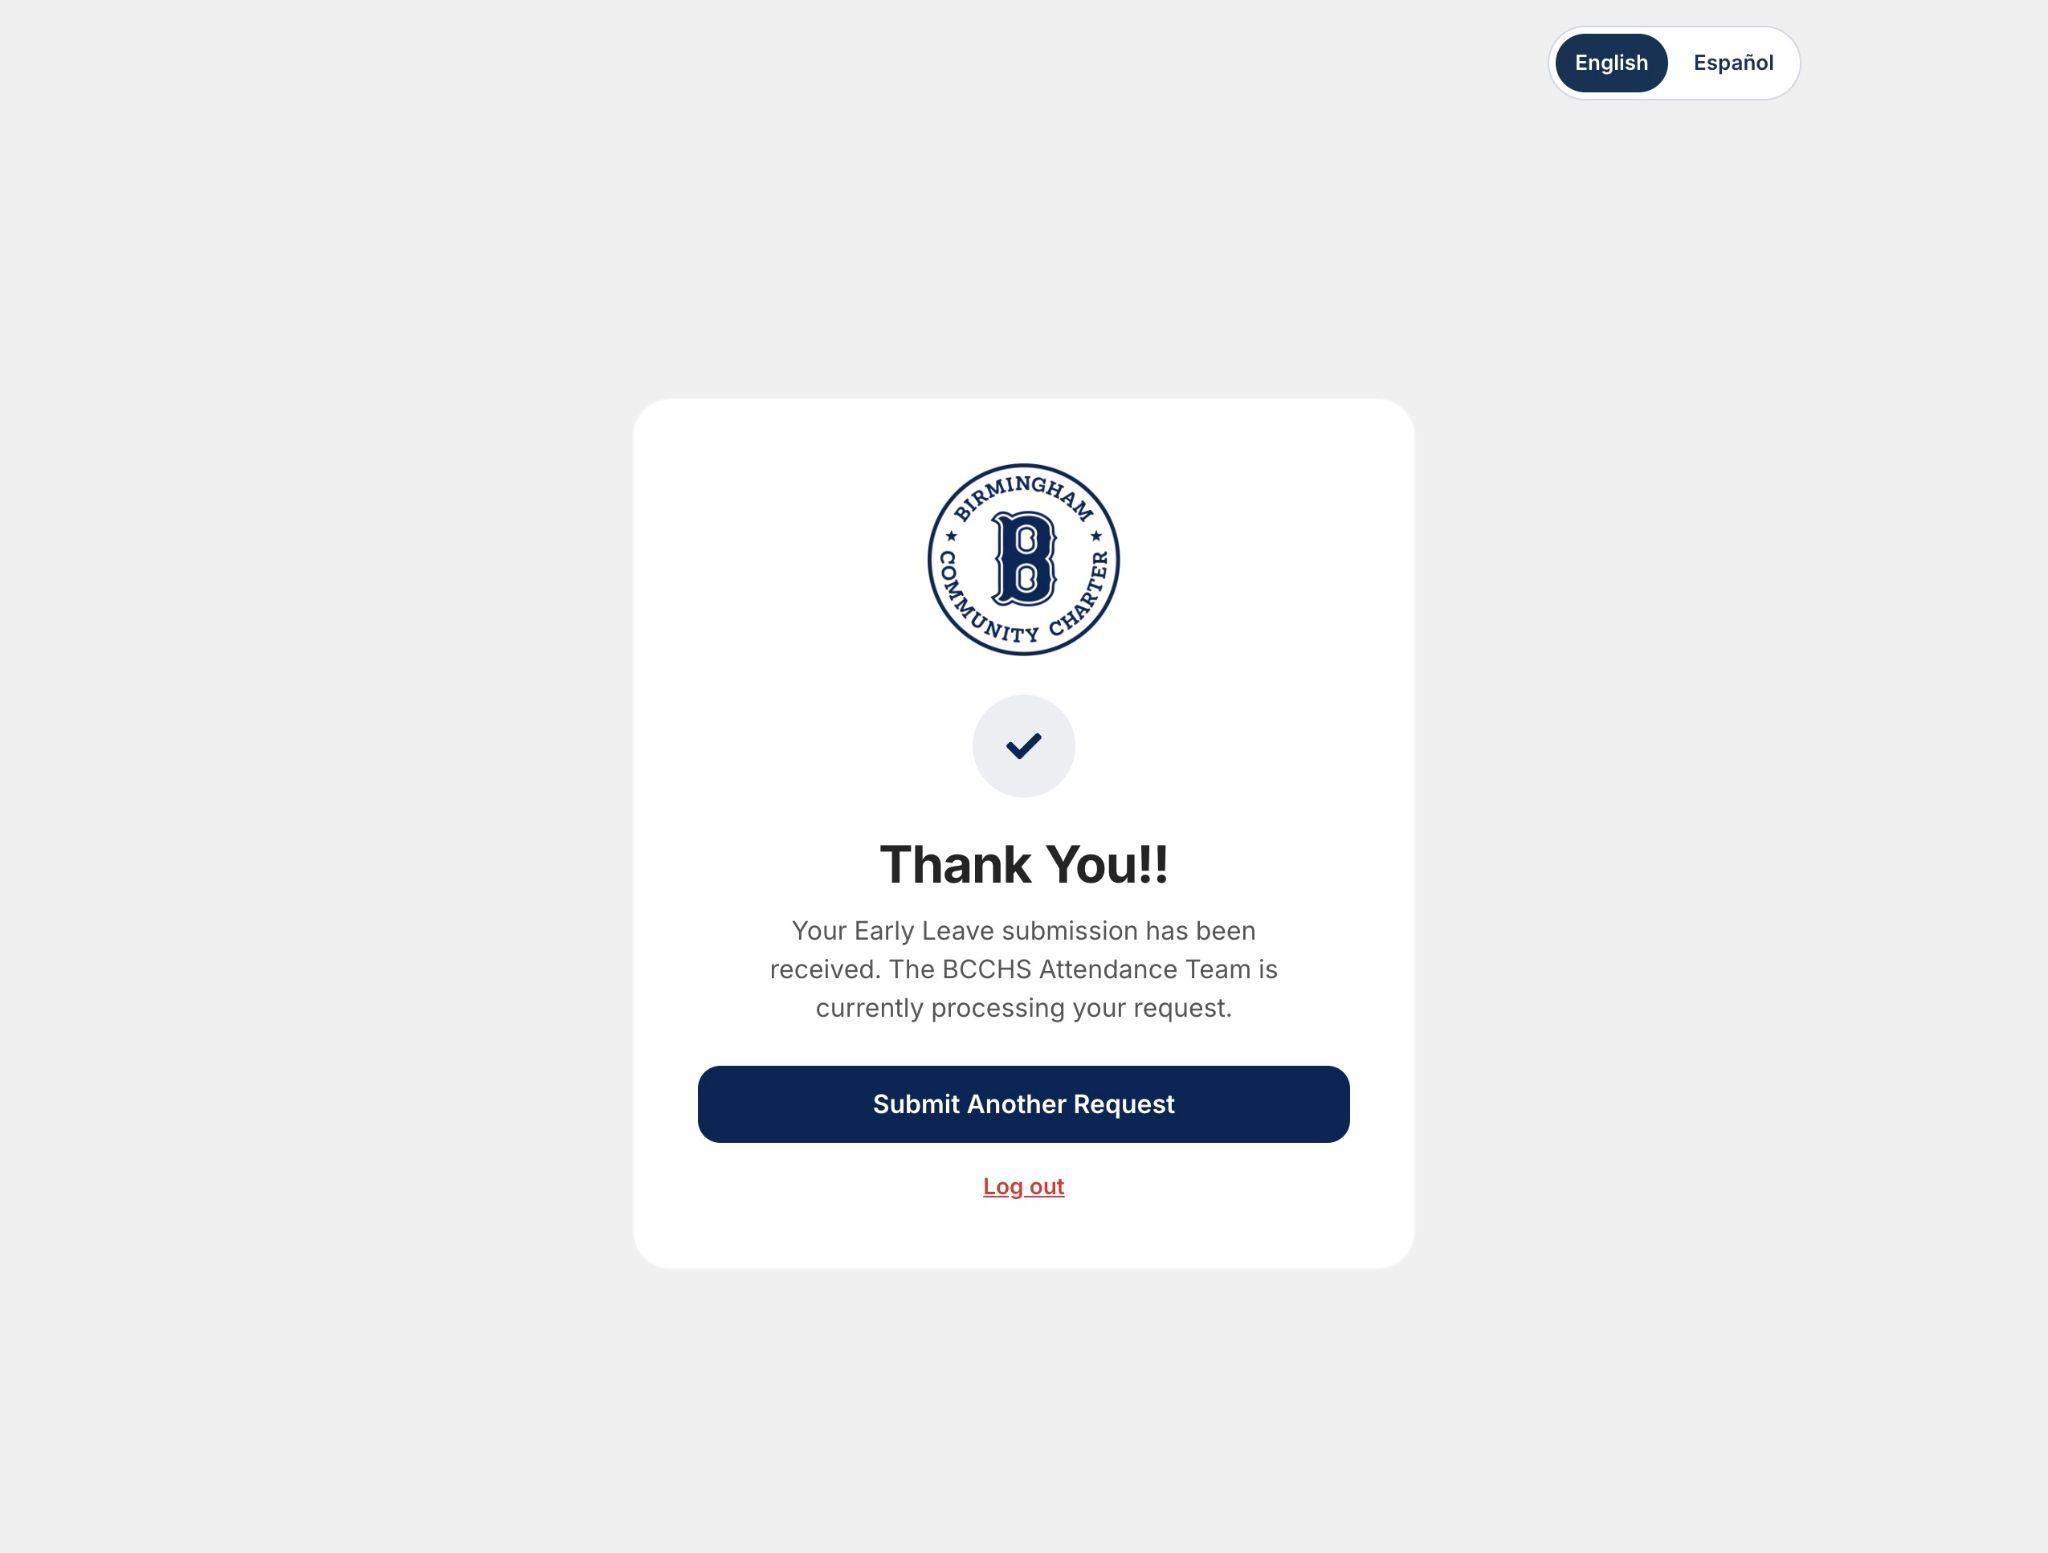
The parent opens the secure link, selects the leave date, periods, reason, and release time, then submits. A confirmation screen acknowledges the request.
Request status
Submitted
Kiosk verification
Not yet available
Aeries SIS
No change yet
Steps
- Open Early Leave from the student profile or secure link page.
- Select the requested leave date. The date picker starts from today and does not allow dates before today.
- Wait for the system to load the schedule for the selected date.
- Select every period during which the student will be absent. Multiple periods can be selected.
- Select one reason. Only one reason can be selected for the request.
- Enter optional comments, up to the character limit shown on the form.
- Enter an optional alternate phone number. If entered, it must be a valid phone number.
- Select the required release time.
- Select Submit.
Local support guidance
Support
Confirmation and support
The system uses loading indicators, validation messages, confirmation messages, and error messages to show what is happening. Staff should use the message shown on screen as the first troubleshooting clue.
Common messages and recommended responses
| Message | Recommended response |
|---|---|
| Missing required information | Ask the user to complete the field marked as required. |
| Invalid date or release time | Ask the user to select a valid date or time again. |
| No schedule available | Confirm the requested date and explain that the system needs a schedule to continue. |
| No records found | Explain that there are currently no records available for the selected action. |
| Submission error | Ask the user to try again. If the problem continues, record the student, date, action, and message without collecting unnecessary personal information. |
| Expired link | Ask the user to request a new automated link or return to the school attendance system. |